Registrar signos vitales
Logging vital signs
adhere registra 6 tipos de signos vitales (más "Otro" para cualquier medida personalizada) de dos formas: al instante desde el botón flotante (FAB), o de forma recurrente con un horario programado que aparece en tu pastillero de Hoy — igual que tus medicamentos.
adhere logs 6 types of vital signs (plus "Other" for any custom measurement) in two ways: instantly from the floating action button (FAB), or recurrently with a scheduled reminder that appears in your Today pillbox — just like your medications.
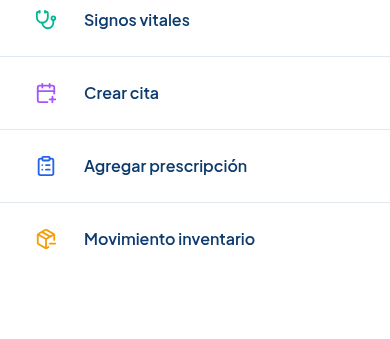
El botón flotante azul está disponible en la pantalla Hoy. Tócalo para abrir el menú de acciones rápidas — tiene 4 opciones: Signos vitales, Crear cita, Agregar prescripción y Movimiento inventario.
The blue floating button is available on the Today screen. Tap it to open the quick actions menu — it has 4 options: Vital signs, Create appointment, Add prescription, and Inventory movement.
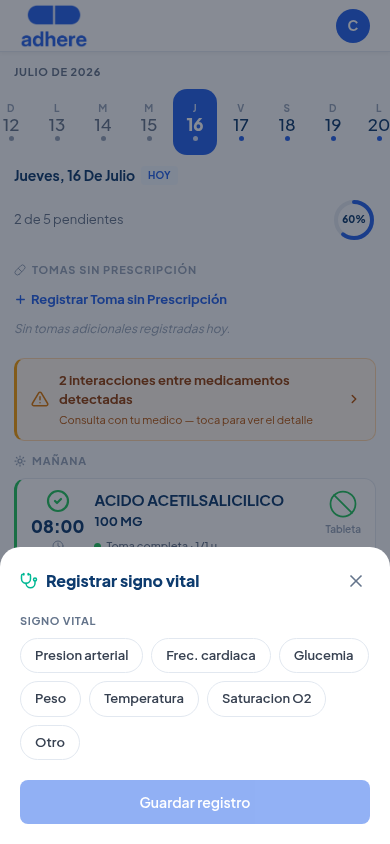
Se abre una hoja de registro rápido (bottom sheet) desde la parte inferior de la pantalla, con un selector de chips para elegir un tipo de signo vital a la vez.
A quick-entry bottom sheet opens from the bottom of the screen, with a chip selector to choose one vital sign type at a time.
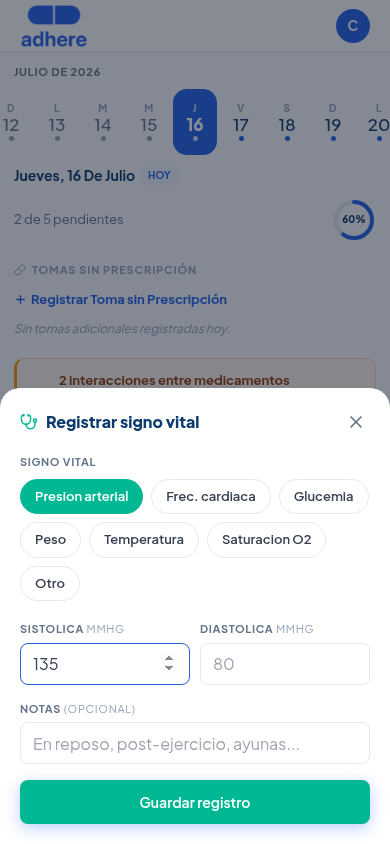
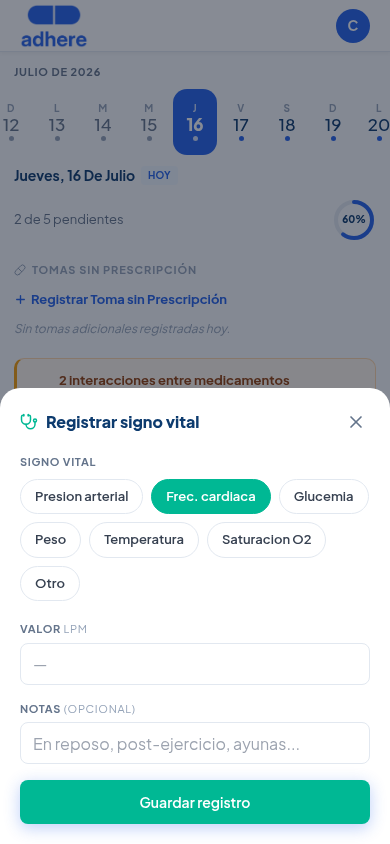
Toca un chip (ej. Presión arterial) y llena sus campos — para presión hay dos (Sistólica y Diastólica), para los demás un solo valor. El botón "Otro" te permite registrar cualquier medida personalizada con nombre, valor y unidad libres.
Tap a chip (e.g. Blood pressure) and fill in its fields — for blood pressure there are two (Systolic and Diastolic), for the others a single value. The "Other" button lets you log any custom measurement with a free-form name, value, and unit.
Si necesitas medir un signo vital todos los días (por ejemplo, presión arterial cada mañana), no tienes que abrir el FAB manualmente cada vez. Ve a Medicamentos → pestaña "Signos Vitales" y toca "Programar signo vital" — abre un asistente de 4 pasos (Signo vital → Frecuencia → Horario → Duración), igual al de crear una prescripción.
If you need to measure a vital sign every day (for example, blood pressure every morning), you don't have to open the FAB manually each time. Go to Medications → "Vital Signs" tab and tap "Schedule vital sign" — it opens a 4-step wizard (Vital sign → Frequency → Schedule → Duration), just like creating a prescription.
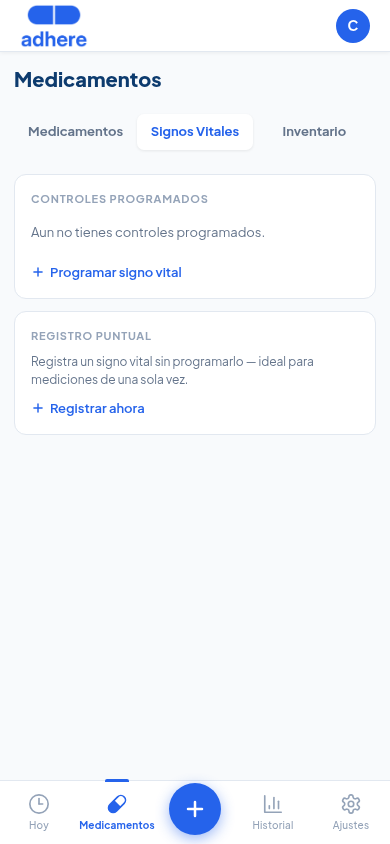
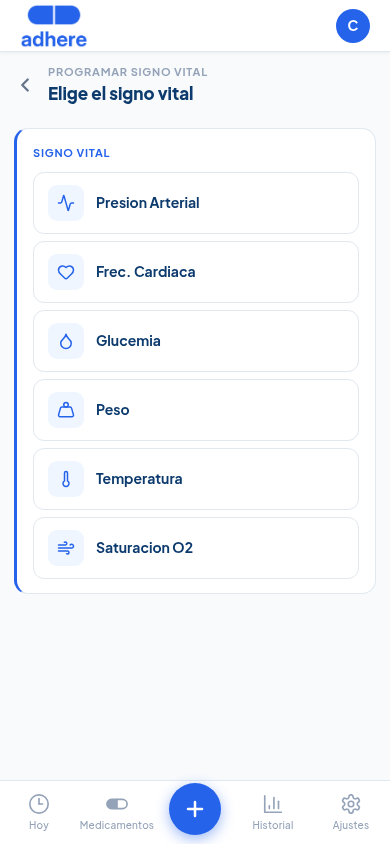
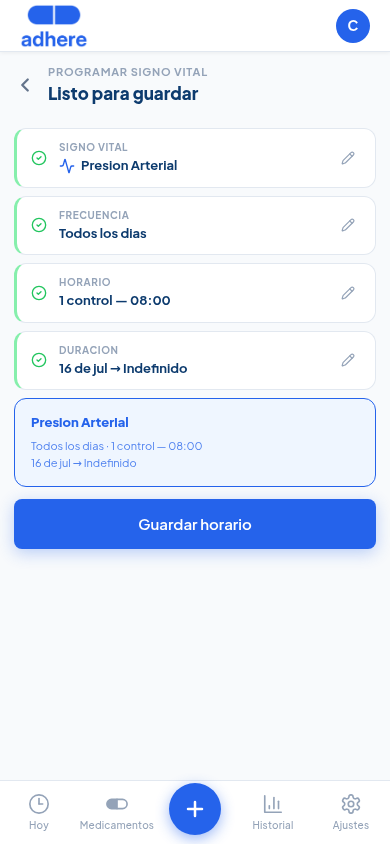
Los siguientes pasos se acumulan en una sola pantalla — frecuencia (todos los días o días específicos), horario (una o varias veces al día) y duración (con o sin fecha de fin) — hasta llegar a un resumen final antes de guardar.
The following steps build up on a single screen — frequency (every day or specific days), schedule (once or several times a day), and duration (with or without an end date) — until you reach a final summary before saving.
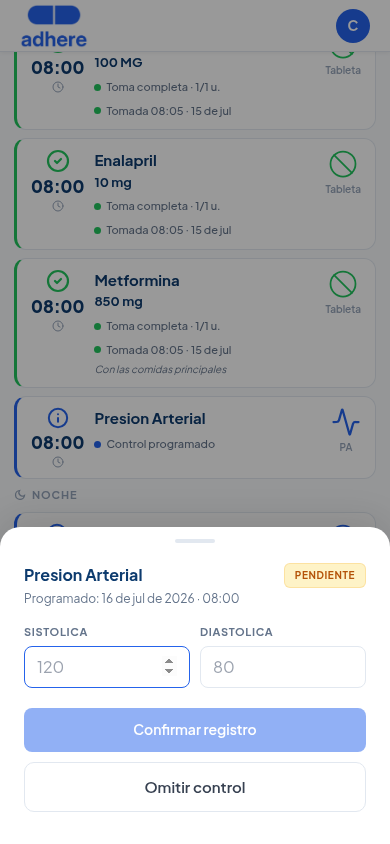
Un control programado no vive en una sección aparte — se mezcla directamente en las mismas franjas horarias (MAÑANA, TARDE, NOCHE) que tus medicamentos, con la misma tarjeta y el mismo lenguaje visual: borde azul mientras está pendiente.
A scheduled check doesn't live in a separate section — it blends directly into the same time slots (MORNING, AFTERNOON, NIGHT) as your medications, with the same card and the same visual language: blue border while pending.
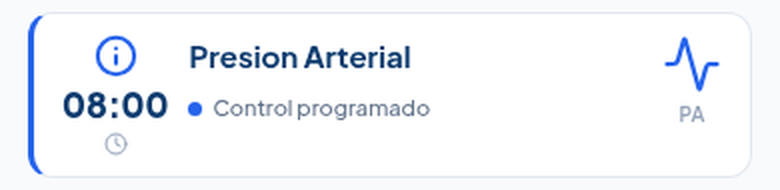
Toca la tarjeta para registrar el valor directamente ahí — "Confirmar registro" lo guarda como una lectura normal de signos vitales (visible luego en Historial), o "Omitir control" si no pudiste tomarlo.
Tap the card to log the value right there — "Confirm entry" saves it as a regular vital-sign reading (later visible in History), or "Skip check" if you couldn't take it.
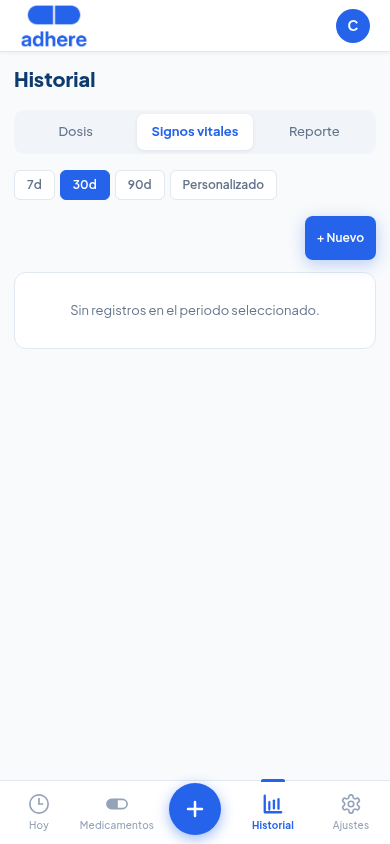
Los signos vitales del día aparecen en la sección SIGNOS VITALES de la pantalla Hoy. El historial completo está en Historial → pestaña "Signos vitales".
Today's vital signs appear in the VITAL SIGNS section of the Today screen. The full history is in History → "Vital signs" tab.
En Ajustes → Funciones activas → Signos vitales puedes activar o desactivar los tipos de signo vital que aparecen en el reporte y en la pantalla Hoy. Esto no afecta el registro ad-hoc desde el FAB — ahí siempre ves los 6 tipos + Otro.
In Settings → Active features → Vital signs you can turn the vital sign types shown in the report and on the Today screen on or off. This doesn't affect ad-hoc entry from the FAB — there you always see all 6 types + Other.